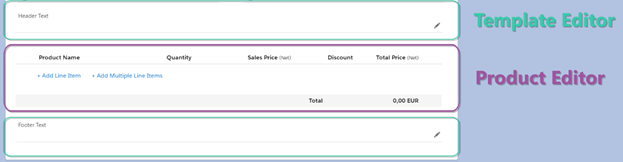
The package contains the new UI components which are designed for efficient and easier Quoting & Invoicing process. The components are Template Editor and Product Editor:
Note: the components are adapted for using on several objects. Product Editor can be used on Quote, Opportunity and Order. Template Editor can be used on Quote and Order.
In order to move these components on the page, do the following steps:
1. Open Setup
2. Enter Lightning App Builder in the Quick Find box and select Lightning App Builder option
3. Choose the corresponding page or create the new one
4. Switch to Edit mode of the page
5. Scroll down and find Custom – Managed components section:
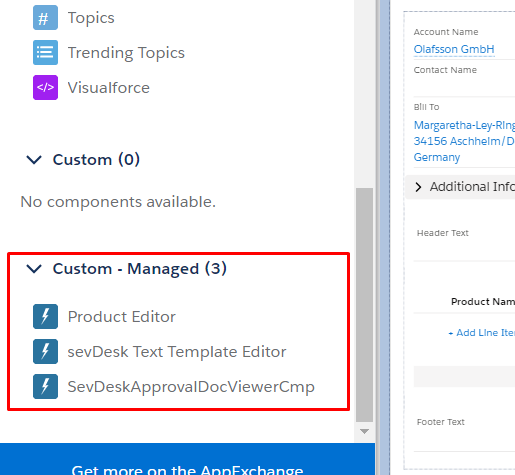
6. Move the corresponding component on the page
sevDesk Text Template Editor component has several settings where you should specify the corresponding Object Name and the Field Type:

7. Save the changes (probably you need to activate the page)
Let’s overview the first component – Template Editor.
This component allows you to efficiently manage the header and footer texts for your financial documents. There is an ability to enter the text manually, choose the existing text template, that should be applied, or you can easily create the new one:
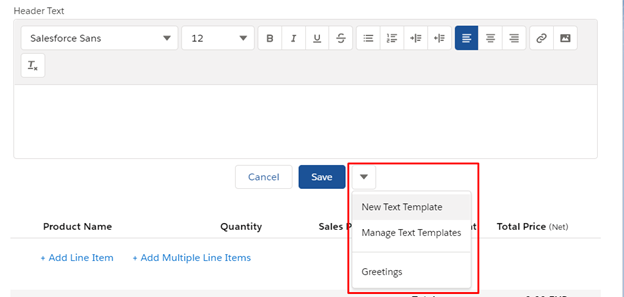
To create the new text template, click “New Text Template” option and set the template with appropriate data:

You can also manage all your templates by clicking “Manage Text Templates” option. It will redirect you to the Text Templates list view where you can make the corresponding changes.
In order to use the desired text template, select it in the dropdown. The template will be applied, and then you can save the changes.
The next component is Product Editor.
With the help of this component, you can add and make the necessary changes to the product positions just in a few clicks. Let’s overview the functions of the component.
You can add the single position (with “Add Line Item” function) or select the multiple positions at once (“Add Multiple Line Items” function). Choosing the multiple selection invokes the modal window where you can search for the corresponding products you want to add:

After adding the position, the following field values are automatically predefined with the corresponding product data:
- Unit Type – the predefined value comes from Unit Type (cwharf_sevdesk__Unit_Type__c) field on Product object
- Sales Price – the predefined value comes from the corresponding Price Book Entry of the product. Field is List Price (UnitPrice)
- Sales Tax (%) – the predefined value comes from the corresponding Price Book Entry of the product. Field is Sales Tax (cwharf_sevdesk__Sales_Tax__c)
- Description – the predefined value comes from Product Description (Description) field on Product object
You can configure your product with the appropriate values at once and then the component will save your time by automatically applying the corresponding values to the positions.
The component allows you to add the global discounts/surcharges. The corresponding function is “Add Discount/Surcharge“:
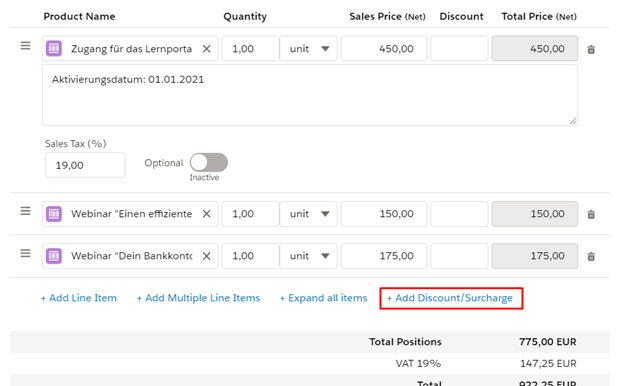
Clicking the function invokes the modal window where you can add the appropriate discount/surcharge:

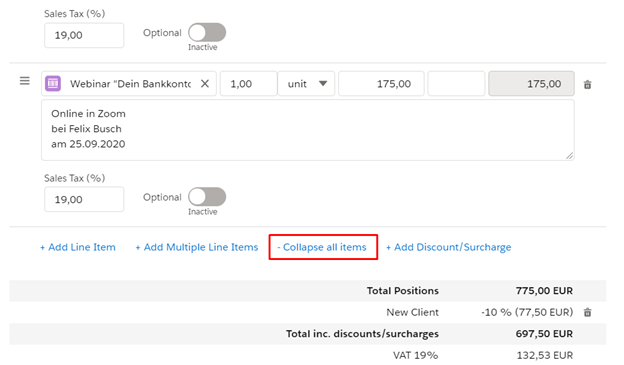
Also, there is an ability to expand all the positions. This can be useful when you need to view all the positions at once to make sure they are correct. The corresponding function is “Expand all items“. In order to close the positions detail state, click “Collapse all items” function:

One more important function of the component is sorting of the positions. You can just drag the position and then drop it in the appropriate place:

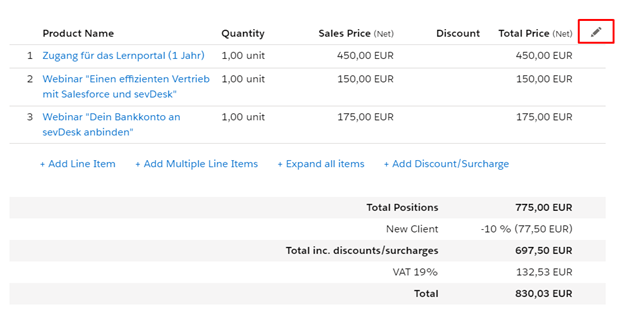
At the bottom of the component, you can see the total summaries which are dynamically recalculated while editing the positions. It gives you the faster and flexible way to track the totals without having to switch between pages:

After saving the changes, the view mode is applied. In order to switch to edit mode, click on the corresponding icon in the top right corner: